How to Build an Urban Garden That Actually Thrives (Even on a 6x12 Porch)
Updated: Aug 31

This post may contain affiliate links. If you purchase through these links, I may earn a small commission at no additional cost to you. I only recommend what I truly use and love.
A Suburban Garden
My red brick Cape Cod style house in Pittsburgh was where I really got into gardening.
I started by establishing modest flower beds in the front and a square patch in the back yard for tomatoes. As my marriage foundered, my garden became an outlet for my rage. After my divorce, the garden became my therapy.
I read everything I could find about gardening and acquired a massive library of gardening books. I picked the brains of dozens of garden center employees and friends with many years of gardening experience. I called the Pennsylvania Garden Hotline to talk to a Master Gardener more times than I care to admit.
With many gardening experts’ advice and encouragement, in a few years’ time I dug up my entire back yard using only a shovel. I picked through the fill dirt used to grade the property when it was built in 1955, removing cans, rocks, bricks, nails, and other detritus from the original construction site. To the sad soil that remained I added dehydrated cow manure bought by the bag and the rich black humus that emerged from the enormous compost pile I started in a sunny spot at the back of the yard.
The plants loved the revitalized soil. The carefully-selected perennials, shrubs, and annuals I planted grew like crazy. Every year I dug up a new section of my back yard.
Over time, I dug out (again, with a shovel) pathways around each bed, filling them with pea gravel. I added a sundial and other garden statuary to provide structure.

The Korean camellia tree planted in the garden’s center and the Miss Kim lilacs planted in the perimeter filled the neighborhood with gorgeous fragrance in the spring. The hydrangea garden included dozens of varieties and bloomed from April until November.
The annual flower and vegetable gardens changed yearly as I experimented with color, scent, and flavor. Every Saturday morning I would cut flowers from my garden and spend hours that evening arranging them to place in every room.

The vegetable garden always included six gigantic tomato plants—at summer’s end, I would fill my wheelbarrow with tomatoes and deliver them to my neighbors.
Eventually, my garden was where all the neighborhood teens posed for prom and graduation photos. I repainted an old garden bench a bright lilac and placed it among the hydrangeas to give them more photo staging options.

My garden saved me.
As my garden expanded, so did the gardening tasks. From March until late November, I would tend to the garden on weekdays for a couple of hours before work; after work I would remain in the yard toiling until dark. On weekends I was in the garden by 7 am and would work until it was so dark that I could no longer see my hands in front of my face.
It was wonderful and incredibly rewarding.
But by November I longed to sleep in and lounge on the sofa with a book and a cup of coffee or glass of wine. Shutting down the garden at the end of November was a mix of melancholy and relief.
In February, when the seed and plant catalogs would start arriving, my longing for leisure would fade and I would start planning my spring planting, counting the days until I could get back outside. After a few months of not getting my hands in the dirt, I was more than ready to get back to my garden.
Then Pittsburgh's economy, especially in technology, tanked. Local work opportunities disappeared. Remote work was not yet a thing. I had to go where the work was. In my case, this meant to Ft. Lauderdale, FL, living in a second floor apartment with no gardening space.
At first, with a new job, new surroundings, and new friends, my life was very full and exciting. I didn’t miss my garden—or so I thought. But, three years into living in Florida, I went with a friend on a four-day trip to Washington, D.C., and unexpectedly burst into tears while touring the Smithsonian Gardens.
Sitting down to compose myself, I realized that gardening was essential to my mental well-being, and I had to figure out how to add it back in to my life.
After almost four years of living in Florida, I became tired of its heat, humidity, and hurricanes. I hated being so far away from family. While mulling my options, an ex-colleague called me. He had recently taken an executive role at a tech company in Scottsdale, AZ, and wanted to know if I would consider relocating to work in his product group.
It was closer to my siblings on the West Coast, and it definitely wasn’t Florida. I interviewed, got the job, and moved to Scottsdale, this time into a third floor apartment with no gardening space.
Again, the distractions of a new job, new surroundings, and new friends consumed me for a time. Within months, though, it dawned on me that, while the desert is objectively beautiful and sculptural, its primary color is brown, not green. And I wanted green. Lots of green.
An Urban Garden
I resolved to move to Portland, OR, where my youngest brother and sister lived. I’d be near family. Portland’s moderate climate was heavenly for gardens.
Eventually, I found employment in Portland—and moved into yet another apartment.
This apartment, though, was on the first floor adjacent to a landscaped area where I could plant in pots. That summer I grew tomatoes, coleus, and a few flowering annuals.
It was heaven.
After two years in the apartment, I bought a condo in a Portland city neighborhood. The front porch was 6 feet by 12 feet and faced West. Lots of afternoon light and lots of room for plants.
It was time to establish my urban garden.
For me, establishing and maintaining an urban garden was both familiar and new. While planning my garden I thought, “Well, it’s not much different than an in-ground garden except that everything has to be in a pot—right?”
Not quite.
I had always planned my garden down to the square foot. I started with graph paper and eventually graduated to PowerPoint—which I knew very well from my years working in tech.
As soon as I created the slide to represent my front porch space (to scale!), I realized how limited my space was. I created shapes using standard pot measurements, started moving them around, and became frustrated.
When working in my suburban garden, if I wanted to add plants, I simply dug a new hole. When I ran out of space in the back yard I started planting in the front yard.
I no longer had that luxury. I had to curb my plant lust in my urban garden, where everything needed to be grown in a pot, limiting the size, number, and types of plants I could grow.
Which meant that a Korean gardenia tree was out of the question (sob).
I built a manageable plan in PowerPoint, which went out the window the minute I set foot in a garden center. My porch and front steps were packed with plants arranged around a narrow path to the front door. As they grew, navigating to my front door got dicier and dicier.


Starting in early August, the UPS, Fed Ex, and Amazon guys simply started throwing deliveries onto my doormat from the top step of the condo's exterior stairway.
In Year Two I was better disciplined (no more flying packages). Also, since the space looked more cohesive and planned, my front porch no longer gave the impression that a lunatic plant person lived there.

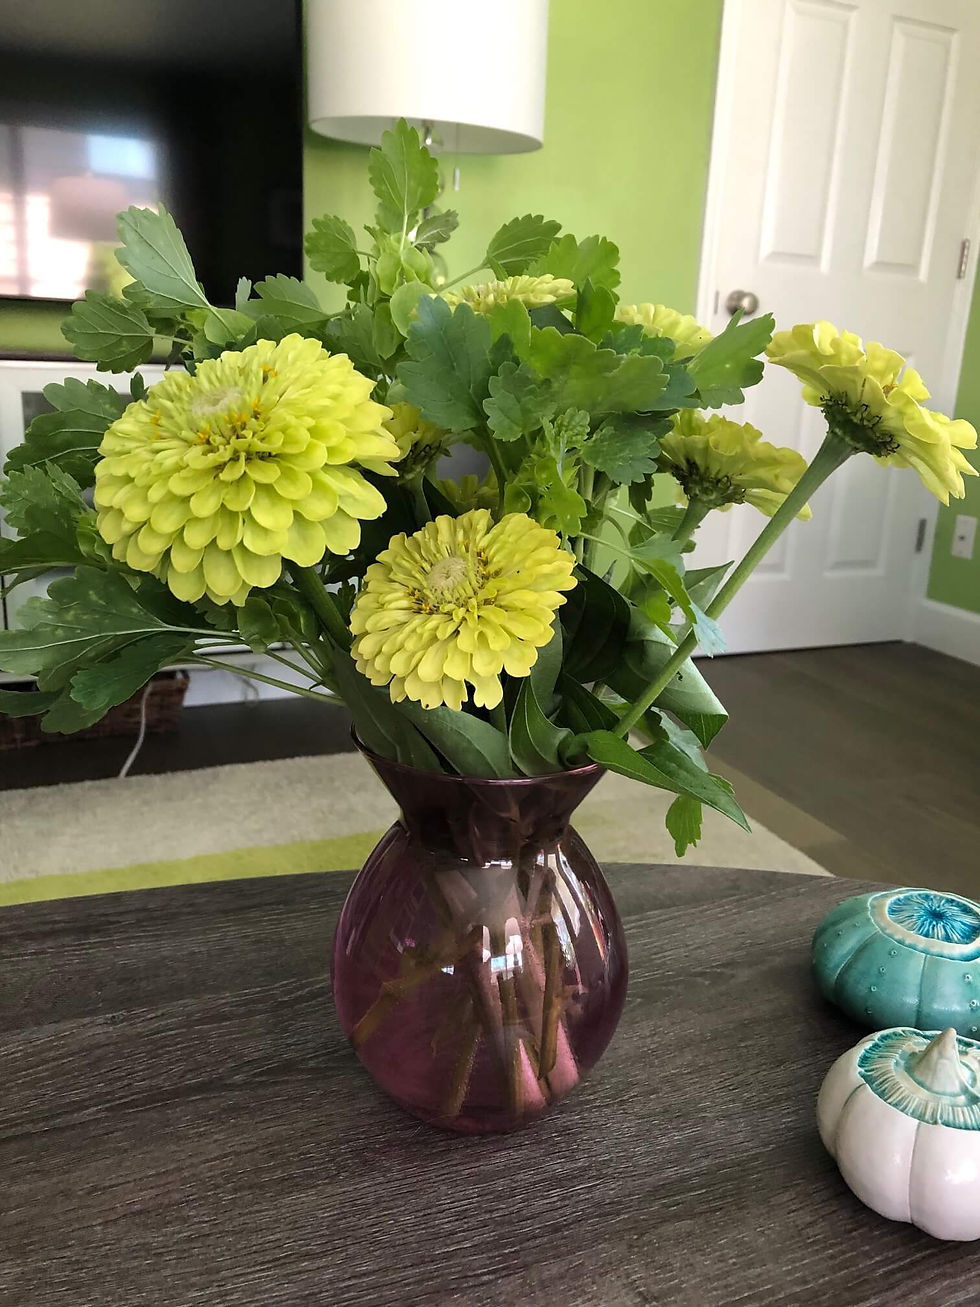
Over time I started getting compliments on how great my porch looked. I grew tomatoes, green beans, and herbs next to shrubs, perennials, and annuals. I was able to restart my weekly flower-arranging tradition. All from a porch that measured six by twelve.
Here’s how I did it and what I learned.
Start With the Sun
For me, the biggest challenge to successful gardening anywhere is availability of sunlight because it’s the one element you can’t control. My urban garden faced West, which meant that in the summer my potted plants would get 6 to 8 hours of intense hot afternoon sun.
Also, my garden’s hardscape (concrete and siding) would absorb and retain some of that heat, making my garden hotter for longer periods than a garden planted directly in the soil.
Because Portland gets very little rain in the summer and plants in pots dry out much faster than they do when planted in the ground, I needed to make consistent watering a priority. I watered my garden every morning to give my plants the best chance to absorb the water they needed to withstand the afternoon heat.
When I water potted plants, I soak the entire container by watering the soil (not the plant) a little at a time to avoid overwatering, which depletes oxygen and leaches nutrients in the soil. As soon as I see water seeping from the pot’s drainage holes into the saucer, I stop watering.
No matter which compass point your garden faces, morning watering is the best approach. To check if your plants need to be watered, insert your finger in the soil a couple of inches down. If the soil is dry, it’s time to water.
If your mornings are hideously busy and you don’t have the time to water, just do it when you can and be consistent.
But, as I have found to my sorrow, just keeping a plant consistently watered doesn’t guarantee that the plant’s leaves won’t burn from exposure to intense sun.
When I moved into my Portland house, before establishing my garden, I planted a Japanese maple in a very large container (32” high and 42” in diameter) sitting directly on the ground, surrounded on two sides by concrete that got 6 hours per day of direct summer sun.
I planted a variety that thrived in full sun and had the positive ratings to prove it—but the summer I planted it, the heat was especially intense, and during the hottest part of the summer, the top half of the tree fried to death.
The next year I waited with bated breath to see if the tree survived its ordeal (it did), and then how it did during the hottest and sunniest part of the summer. Thankfully, it had acclimated and did great. Some of the top branches actually grew back and leafed out beautifully. Whew. One tough little tree.
Choose Plants for Your Space and Your Heart Will Follow
I’m going to say this out loud: don’t buy plants you love if they are wrong for your space and conditions. That means you may have to turn your back on the absolutely adorable Cousin It plant that fried on my front porch, or the all-black Evening in Chernobyl coleus (I’ve lost count of the number of coleus I’ve killed).
To select the best plants for your urban garden, use the following criteria:
The number of hours of sun your garden gets per day,
The direction your plants face (plants facing west get the most intense sun),
The time of day your garden gets sun (morning sun is less intense than afternoon sun),
If the reflected heat from your hardscape makes the space hotter,
The amount of water the plants needs to thrive.
Otherwise you could end up with a plant fry-up or a dark green mass of slime, so matter how diligently you water (or don’t water).
Be strong, people.
Walk away from plants that aren’t going to work in your space. Look at the plant tag before you buy. Doing your due diligence increases your chances that more of your plants will thrive.
Unfortunately, sometimes the information you get doesn’t line up with your experience when you get the plant home. A very cute curly leaf basil plant I bought that was supposed to thrive in full sun actually thrived in partial shade. Luckily I caught it in time.
Sometimes, with a bit of research, you can find a plant similar to the unsuitable candidate you fell in love with at the garden center.

I love hydrangeas, and I wanted a pair of large specimen plants to place on either side of my front door. Unfortunately, most hydrangeas would die a quick and violent death on my intensely sunny and hot condo porch—but, with a bit of research, I found a sun-tolerant dwarf Pee Wee Oakleaf Hydrangea that did just fine, producing masses of white conical flower clusters in the summer. Another bonus is that they looked great all year, even during the winter, when I draped tiny white outdoor lights on them to highlight their peeling, reddish bark.
When I moved into my house, I was able to satisfy my hydrangea lust with full-size Oakleaf Hydrangeas and Limelight Hydrangeas in the full-sun front yard, and several varieties of smooth hydrangeas in my part-shade backyard. Everyone is doing great—thanks for asking.
Besides light, heat, and water requirements, consider the height and width that the plant will reach at maturity. This was part of my problem with my first year’s garden while in the condo. I was so plant-drunk that I didn’t consider how big everything would get, and I ended up with a horticultural obstacle course.
Many vegetables do well in urban gardens, especially tomatoes, which I grew in 10-gallon plastic pots.
Look for varieties developed to grow on patios and porches, or select determinate plants.
And just because determinate tomato plants are smaller than their indeterminate brethren doesn’t mean the fruit they produce is smaller. Check out this big-ass tomato from a determinate Big Girl tomato plant I grew on my deck.

I also harvested a lot of tomatoes from the plants on my deck.

Herbs are great to grow on a sunny porch or deck because most thrive in the sun and stay at a reasonable size. Some herbs, like rosemary and lavender, can thrive for years in a pot if you put the plant in a sheltered spot during the winter. I also grew pole beans on a trellis in a huge pot and had fresh beans every night for eight weeks running. Heaven.
Containers Matter More Than You Think
Selecting containers is part of the fun of urban gardening, but there’s also science to consider. Is your container wide enough and deep enough to fully accommodate the plant’s roots? Is the container’s footprint big enough to keep the plant from going over in a high wind, or if someone bumps against it? Most plant tags will not provide a plant’s mature root depth, but the internet will—Google it at the garden center to make sure before you buy.
Container size is most critical when you’re planting a shrub or a tree. Happily, it’s easy to find shrub and tree varieties developed specifically for patios.
That said, sometimes even the best-laid planting plans can blow up. One year I grew a dwarf butterfly bush in a 30-gallon pot that I thought would support it for 3 seasons. It was so happy that it became hilariously massive in its second year—and by the end of the summer it was seriously stressed in its too-small pot. I managed to replant it on the condo property where it continues to thrive.
I’m not a snob about what a pot is made from. Hell, I used black plastic garden center pots for my tomatoes. One caution is if you prefer clay or ceramic pots, remember that they are breakable, heavy, dry out quickly, and can also crack when the weather turns very cold and the water in the pot freezes and expands.
If you really want clay pots, but don’t want to move them to a protected area when winter comes, you can get resin pots that look very much like clay pots. They are hideously expensive but they don’t crack in cold weather, last almost forever, and retain water longer than a clay pot.

Metal pots are an interesting and durable choice, too. Just make sure they are rust resistant (the plant won’t care, but rust can stain concrete). Also, remember that they can get hot to the touch during the hottest part of the summer.
In addition to material and size, outdoor plant pots come in a huge variety of shapes and colors. I acquired my pots over time so I had a little of everything—but if you want more uniformity, find a few brands with an aesthetic you like and stick to them. You may also want to key your pot selection to your home’s style. Or, stick to a certain material, color or specific color range. One of the most memorable and striking container gardens I ever saw was where all the pots were various shades of blue.
Soil and Soil Amendments
When container gardening, use soil that’s made for containers, aka potting soil. It’s formulated to best meet the drainage, aeration, and moisture retention needs of plants growing in a container’s confined space.
When you’re at the garden center or big box store you’ll probably see “potting soil” and “potting mix”.
Which is better? That depends. Potting mix doesn’t contain dirt or soil and is formulated for optimal drainage. Potting soil has actual soil in it along with elements like perlite (those little white bits) to encourage drainage. Because potting soil has soil in it, it also contains nutrients that plants need to flourish.
Since potting mix has no soil, it’s free of pests and plant diseases, but you have to be very diligent about watering and fertilizing. Potting soil can contain pests or seeds that will threaten the health of the plant living in it, but you water and fertilize less.
My rule of thumb is to use potting mix to start houseplants and plants that can’t stand to be waterlogged, water and fertilize as needed, and watch how they do. Once those plants get larger, I switch over to potting soil and watch to see if the plant is OK with the switch.
The one exception for me is succulents, which will literally rot in their container if you water too much or if they don’t have proper drainage. Cacti need potting mix, too. Use one that's specifically for cacti and succulents.
Plants that I grow outside in a 2-gallon or larger pot get potting soil from the git-go. For plants with serious drainage needs, I’ll throw extra pearlite in the pot when I plant, and watch the plant like a hawk to make sure it’s draining properly.
An interesting old wives’ tale told to me by a neighbor that turned out to be true (for me, at least) is that when you plant lavender in potting soil with added sand, the lavender is more fragrant (she actually said “Lavender does better in crap soil.’”). Lavender is one of those plants that needs good drainage or it fades away after a couple of years in a pot.
For all the annual flowers and vegetables I grew on my deck, I standardized on Neptune’s Harvest fish emulsion. It’s stinky, but the smell fades after 24 hours, well worth how happy it makes my plants.
For potted perennials, shrubs, and trees, I use organic slow-release pellet fertilizers with the balance of nitrogen, phosphorus, and potassium (called macronutrients) that best serves the plants’ needs. Here’s my go-to list:
Use twice annually on Hydrangeas & Japanese Maples | |
Use monthly in season on tomatoes and dahlias | |
Use monthly from April to October on perennials & butterfly bush | |
Every two weeks in season on annuals and vegetables | |
Add to the planting hole with planting tomatoes and dahlias |
Design Your Space Before You Buy Plants
Urban gardening usually means that your space is limited. Initially I was seriously constrained by my massive synthetic wicker chairs, which I dragged around my deck for three years, trying to get them to fit in the smallest space possible.
I finally gave up, donated the chairs to Goodwill, and bought a reasonable-sized synthetic outdoor wicker loveseat that fit nicely at the far end of the porch (measure twice, buy once), where I spent many happy hours relaxing and admiring my plants as they grew.
When you create your initial space plan, start with the large objects like seating and large specimen plant pots, then fill in around them with smaller pots. Be sure to leave room for you, family and friends, and delivery personnel to easily navigate your urban garden.
Then—and I cannot emphasize this enough—take your plan with you to the plant center to keep your plant lust at bay.
Squeezing More Plants into Your Space
By the time I ditched the big awkward wicker chairs, I had also learned some tricks to jam more plants onto my porch while still leaving space to move around.
Look at your “official” urban garden space. Is there any adjacent space that you can take over with impunity during the growing season (i.e., not annoy your neighbors, the property manager, HOA, etc.)? Since I wanted more specimen plants, I placed two giant pots (one size down from my hydrangea pots) at the bottom of my porch stairs, one on each side of the staircase, for fabulous acid green Mediterranean Spurge (euphorbia) plants.
Technically, the landing at the bottom of my stairs was the property of the HOA, but was used only to climb the stairs to my front door. To be sure that no one complained, I placed the pots so they didn’t impinge on the main walkway and block traffic through the condo property.
Speaking of stairs, since my staircase was a generous 36” wide, I eventually placed medium-sized pots (5- and 10-gallon size) on the sunny side of the stairs for annuals like Zinnia Envy and Bells of Ireland, leaving room for me and the delivery guys to easily climb my stairs.
If your deck or porch is surrounded by a railing, you can expand your planting space with railing planters, which are just what they sound like--planters designed to hang over your railing. Just make sure you don’t water them when a neighbor is standing underneath. I’ve found that it makes them very wet and very cranky.
Specimen plants take up a lot of room, but you can take advantage of the width difference between the top and bottom of a Space Hog pot and place smaller pots at the foot of those big pots.
Another way to cram in more plants without taking up a lot of floor space is by using one or more plant stands, which come in zillions of colors, styles, and price points. Or you can just turn an empty pot over snd use that as a plant stand.
Invasive Plants
Some plants should never be planted in a mixed container. Here’s a short list of highly invasive plants that you can buy for containers; if you MUST grow them, plant them in their own pot and watch them like a hawk. I have experience with the ones listed below; getting rid of them was a crazy difficult.
Mint, which can spread to new containers via its stems if a mint stem comes into contact with the soil in another pot.
Invasive Bamboo, which a particularly moronic Pittsburgh neighbor of mine planted in his yard that spread throughout the neighborhood; he moved before we could burn him in effigy.
Loosestrife, which like bamboo spreads via rhizomes. I grow loosestrife only in containers and raised beds.
English Ivy. Avoid planting at all costs. It is incredibly aggressive, even when grown in a container.
To check whether or not a plant you like is invasive, just Google. You can also read more about invasive plants in this post.
Save Your Back (and Your Deck)
Here are few important safety points about using large pots (or lots and lots of smaller ones) on a raised deck or porch:
Know how many pounds your deck or porch is engineered to support before loading up. Be sure to factor in the weight of furniture, humans, garden gnomes, fountains, etc. Your HOA Board or apartment complex manager should have that information.
Large ceramic or clay pots are really, really heavy, even when empty. Add soil, a plant, and water, and you might have a tough time moving it. I used plant saucers with wheels for all 20+ gallon pots. Saved my back.
If you’re gardening on a porch or deck that’s above ground level, fill your pots with soil and plants while ON your deck. It’s much easier to carry a bag of potting soil or mix up the stairs than carrying a plant in a large pot. This also goes for transferring a plant into from a small pot into a larger one.
Do not carry a large potted plant down your stairs to unpot it at ground level. I did it once and it’s a miracle that I am still alive.
Before I moved to Portland, I thought I’d lost gardening—and a piece of myself—forever.
When I moved into my condo, I simply rethought what a garden could be, and got back everything that I thought I’d lost.
You don’t need land to build something beautiful. You need a plan and a little discipline.
Start small. Pay attention. Adjust.
And then—stop and enjoy it.
Urban Garden Starter Kit
If you’re setting up your urban garden for the first time, these are the items I used.
Containers
10-gallon grow pots (best for tomatoes)
Metal planter on wheels
Vertical & Space Savers
Rolling plant caddies
Watering
Soil + Fertilizer
High-quality potting soil
Organic fertilizers
Fish emulsion for annuals (yes, it smells—yes, it works)
Ready to turn your porch into a thriving urban garden?
Download my Urban Garden Checklist—a simple, no-fluff guide that walks you through exactly what to buy, where to place it, and how to avoid the mistakes that cost me an entire season (and a lot of money).
✔️ Plan your layout like a pro
✔️ Choose plants that actually survive your space
✔️ Get your containers, soil, and setup right the first time
Grab the free checklist and build your garden with a plan—not guesswork.
Because a beautiful, functional urban garden doesn’t happen by accident—it happens by design.
Like Little Green Home?
Subscribe to get new posts that help you build a home you love—that loves you back.
Up Next
I take on a yard that was neglected for 30 years.


Comments