Building a Garden Framework
March to June 2023

This post may contain affiliate links. If you purchase through these links, I may earn a small commission at no additional cost to you. I only recommend what I truly use and love.
Spring begins to arrive in Portland in March. Hellebores, daffodils, and crocus emerge; cherry trees, rhododendrons, and dogwoods begin to flower. Their color is almost fluorescent against the gloom of a typical Portland spring.
Gardeners begin to plan their gardens. Local nurseries are packed every weekend. Flats of starter plants appear at the entrance of every grocery store.
After being stuck inside all winter, Oregonians can’t wait to get out and plant this year’s garden.
And now, after living in Portland for 15 years without a yard, I wanted to get out and plant, too.
The previous Fall, soon after closing on the house, I replaced a scruffy laurel shrub blocking the front bedroom window with oak leaf hydrangeas.
In December, I removed seven trees from the front yard that were threatening to assassinate my house’s foundation.
In March, with the assistance of the neighborhood ducks, I lined the front porch with butchers broom to encourage visitors to use the designated pathway to my front door.
Beyond that, I wasn’t sure what to do next.
The problem? The yard had been neglected for so long that my home’s hardscape and softscape were virtually indistinguishable. Mud covered the exterior concrete and scraggly grass and weeds grew in it. The concrete driveway was edged with weed-choked gravel that eventually morphed into weed-choked grass.
My front yard was a hot mess.
The back yard was worse. First, it was strewn with large rocks. An abandoned, weedy, dubious raised bed lurked in one corner (right where I wanted to put a modern raised bed).
The small brick retaining wall around the French drain had collapsed.
I needed to get rid of the dysfunction and separate the hardscape from the softscape before planting anything.
I wanted order before I added abundance.
I spent months bringing order to a woefully neglected house.
Now I needed to do the same thing to the yard.
What did that mean exactly?
Remove the things that didn’t belong.
Restore the things that had been neglected.
Separate the hardscape and softscape.
After that, I could create my garden.

Removing the Things That Didn’t Belong in My Back Yard
After taking possession of the house in Fall 2022, I did nothing in the back yard except watch Tom and his crew hack down the Chinese elm sapling forest that filled the space and cut down the tree that was leaning against the fence.
Now, walking around the back yard, I found myself tripping over large rocks and pieces of brick that were strewn everywhere.
There was also a mysterious pile of rocks in the center of the yard. An altar to the gardening gods, perhaps? All my neighbors would say about the last tenant in the house was that she was “some kind of artist”, so an altar was possible—but, looking at the sorry state of the yard, highly improbable.
I decided to stop speculating and started removing the rocks, lining them up against the left side fence.
The line extended from the back of the yard to the fence gate that separated the front and back yards.
It was a lot of rocks.

To this day, I have never figured out why.
Luckily, a friend who was establishing a garden took the rocks to cover the footing around her garden shed—with my eternal thanks.
But now I could walk around my back yard without risking a broken ankle.
Another anomaly was a weird, lumpy, weed-choked sort-of raised bed measuring roughly eight feet square. The bed had one retaining wall running parallel to the back patio. The remaining walls were gone, or maybe they never existed. (I decided to save energy by not wondering about it.)
I wanted to place a modern raised bed in that section of the yard but hesitated to simply place the new bed over the old one without investigating what was actually lurking under its lumpy surface.
The last thing I wanted to do was spend money and time on a new raised bed that would fail due to what lay beneath it.
So I started digging and, of course, encountered tree roots a few inches from the surface. These roots were not the Usual Suspects (aka Chinese elm roots), but roots from the large mangy maple tree growing in the undeveloped lot next door.

Awesome.
After ripping, pruning, and sawing them out, I thought I was home free.
Until I hit a layer of chicken wire 12 inches under the surface, and a thick layer of plastic sheeting under the chicken wire.
Neither of which made sense under a raised bed. Chicken wire would inhibit healthy root development. Plastic sheeting would hold water under the bed, encouraging root rot.
This discovery was actually more stupid than the mysterious rocks.
Thanking my lucky stars that I investigated, I gritted my teeth and started the exorcism.

Three hours and many curse words later, the roots, chicken wire, and plastic sheeting were gone.
The back yard was ready for the next step.
Restoring the Things That Had Been Neglected
The day after The Great Backyard Rock Removal I woke up to no rain, remarkable for early Spring in Portland. I decided to rebuild the brick retaining wall around the French drain.
The brick was unbroken. The French drain was doing its job. The problem was poor execution. The brick had simply been laid against the wall of mud with no reinforcement, leaving the wall to fend for itself for who knows how many years.
I first re-laid a part of the wall (smashing my thumb of course) but saw almost immediately that without additional support, I would be re-doing it in less than a year.
So I tore the entire wall out and started from scratch.
Using my Root Slayer shovel, I made straight cuts in the heavy clay soil and added 12” pound-in edging against the soil for stability. I then laid the first two rows of bricks against the edging using a running brick bond (staggering by one-half brick), added 6” pound-in edging in front of the brick for more stability, laid the final two rows, and added more river rock.

Thanks to the pound-in edging, the retaining wall is still standing firm three years later.
Separating Hardscape From Softscape
The following weekend, I started the final step in the process of creating a framework for my longed-for garden.
It took months and involved smashed fingers and toes, hauling hundreds of pounds of concrete block, and sore muscles from pounding edging into place for hours at a time.
Totally worth it.
The grass (and mostly weeds) in the yard was doing a piss-poor job of keeping the mud off my home’s concrete walk, patio, and driveway.
I was undecided about the grass. In my Pittsburgh home, after years of digging up the yard for gardening, I ended up with a small patch of grass in the front that I mowed with a Nannette-powered reel mower.
I was still working out my options for this lawn, so I wanted a solution that would work with or without grass, so Future Me would not be mad at Current Me.
Since my goal was to simply keep the mud the hell off the concrete, I chose the simplest solution possible—pound-in edging.
While I waited for my new rubber mallet to arrive, I scraped all the mud off the concrete. Messy but satisfying.
I started by adding 2.5” pound-in edging around the front porch and driveway.
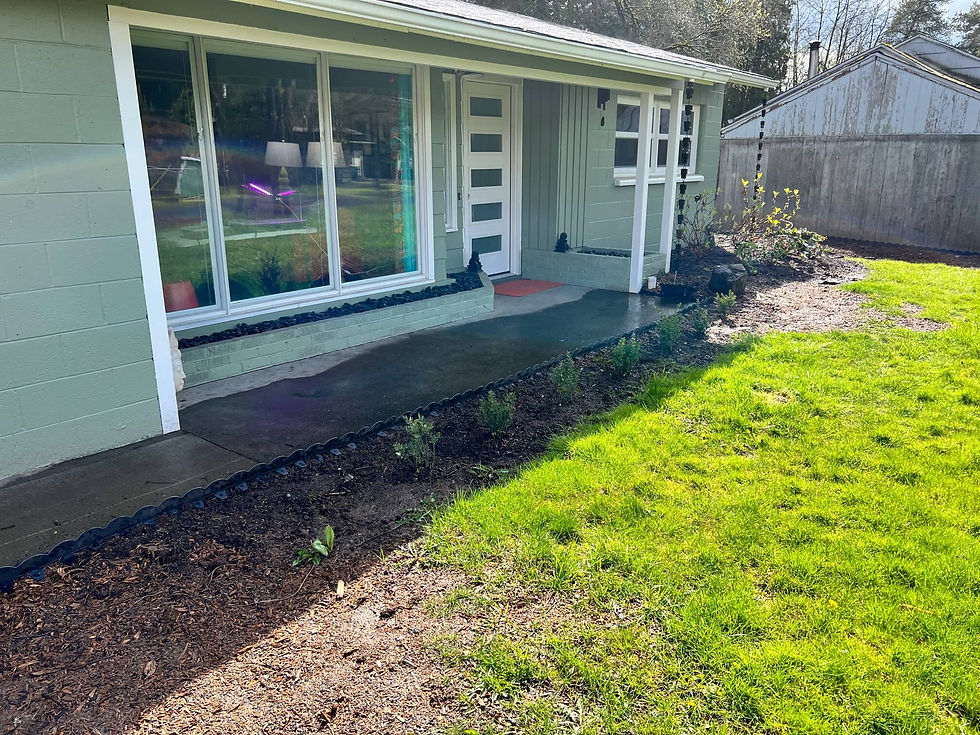

When I received my rolls of pound-in edging, the order did not include enough stakes to keep the edging firmly attached to the ground (which is the entire point, right?). So, I ordered additional plastic stakes for the run-of-the-mill mud and metal tent stakes to get through the Chinese elm roots to keep the edging firmly in place.
BTW, installing pound-in edging is great for your pecs. Just saying.
In the back patio area, the old concrete edging had sunk down below the soil level, so I added pound-in edging—which kept the mud off the concrete but looked pretty terrible.

I eventually got several trunk loads of concrete edging and laid it end-to end around the patio against the pound-in edging.

It was the finishing touch the patio needed.
The best part? Like the retaining wall, the edging is all still firmly in place—and still holding back the mud—today.
When I was finally done, I could actually see where my yard ended and my house began.
I didn’t have a garden yet, but now I knew where my garden could grow.
I was ready to start planning and planting.
Like Little Green Home?
Subscribe to get new posts that help you build a home you love—that loves you back.
Up Next
Water everywhere.


Comments